Working with Feature-Branches in a Subversion Environment
While our recommended workflow for utilizing LemonTree is combining it with GitFlow (see here for details: LemonTree and GitFlow), we realize that not everyone has the possibility to switch their entire workflow to utilize it.
This page presents a way to achieve the same workflow (albeit with a few additional steps) with another widely used version control system: SubVersion (https://subversion.apache.org/).
Goal
The goal of the described workflow is to introduce the usage of "feature branches" - individual workspaces for either a single modeler or a small group of modelers.
These feature branches provide two distinct advantages:
- Multiple different Change Requests/Features can be modelled at once without interfering with each other
- Reviews can/must be made at a clearly established step in the workflow
Tools
LieberLieber recommends the tools in the following table for implementing the described workflow.
| Example Tool Chain | |
|---|---|
| Version Control System: |  Subversion |
| VCS Client |  TortoiseSvn |
| Diff & Merge Tool |  LemonTree (c) Desktop |
| Modeling Tool |  Enterprise Architect |
The mentioned tools are the basis for the described workflow, as well as the screenshots shown in this tutorial. The used TortoiseSvn version is 1.11.0.
Process
Let's look at the process in more detail.
Our starting point is the main subversion repository containing the model we want to work on, referred to as "develop".
This is the repository where our changes shall ultimately end up, but which will not be modified while we're still working on our changes.

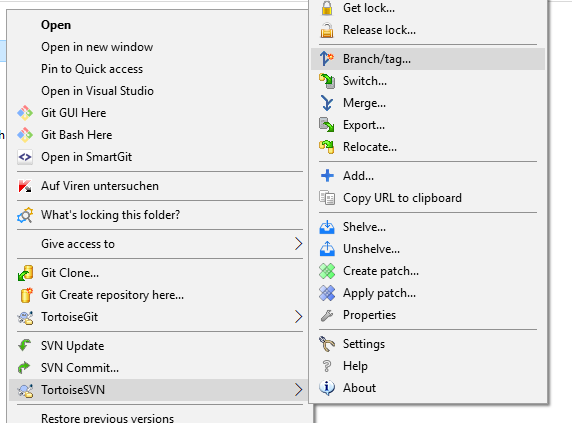
1. Create a new Feature Branch
1.1 Create the Branch
To create a new feature branch directly from "develop", navigate to the "Branch/tag" option in the TortoiseSvn context menu:
Enter the name of the feature branch in the dialog that appears.
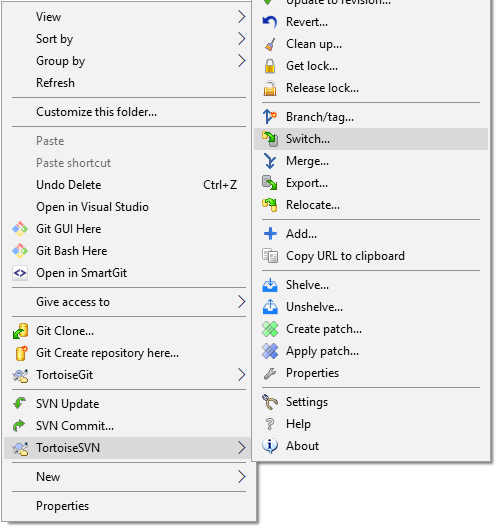
1.2 Switch to the Feature Branch
After confirming the creation of the branch, you are informed that you still need to switch to the created feature branch, so that your changes are stored in the feature branch and not directly in develop. To do so, select the option in the TortoiseSvn context menu:
and select the name you've just given to your feature branch in the dropdown-list:
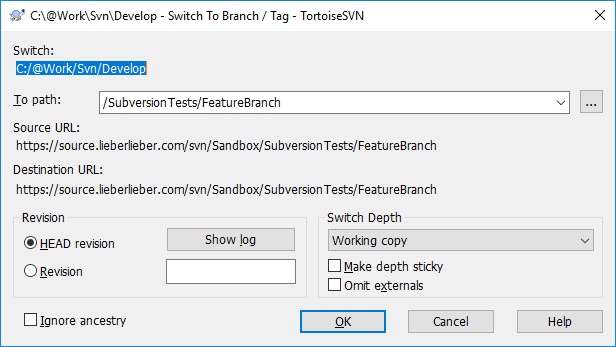
Confirm by clicking "OK".
2. Update my Feature Branch from „develop“
While you're developing your feature branch, other changes may be incorporated into the develop branch.
There are multiple reasons why you should frequently incorporate these changes into your feature branch:
- Your feature branch more closely resembles the current state of the develop branch
- Conflict-Resolution is usually way more manageable in smaller change-sets
- Your feature branch must be up-to-date with all changes in the develop branch before it can be brought back there
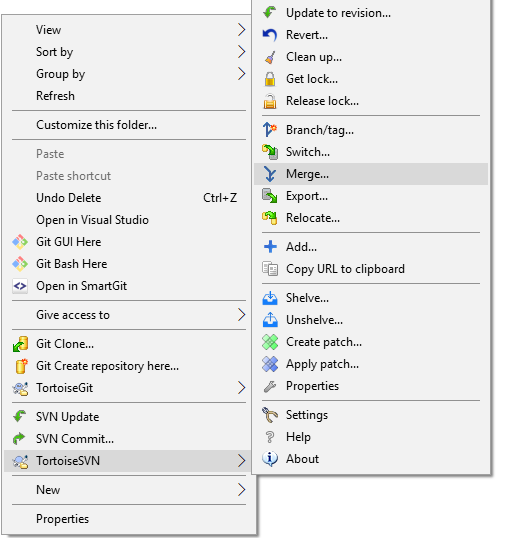
2.1 Merge Changes
To incorporate the latest changes into your feature branch, start the "Merge" option:
Select "Merge a range of revisions" in the first dialog.
Select the develop branch and "All revisions" in the second dialog:
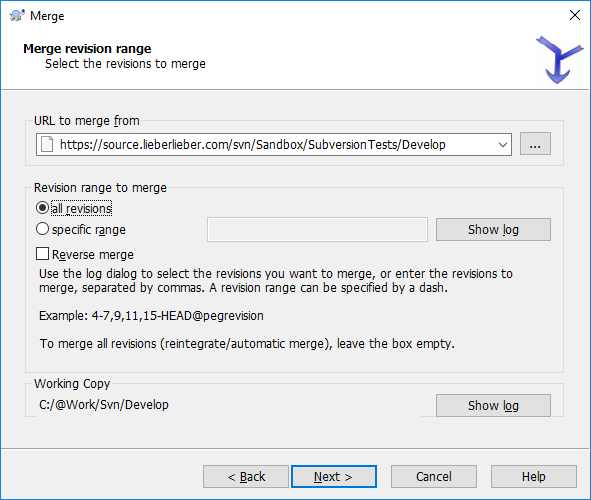
Leave the third dialog as it is.
Start the merge via the "Merge" button.
2.2 Resolve Conflicts
You will now possibly receive an info that a conflict needs to be resolved:

The "Edit" option will start LemonTree to resolve the conflict.
After the conflict has been resolved by LemonTree, click the "Mark as resolved" option to close the dialog.
2.3 Commit Changes
Afterwards, commit the changes to the feature branch.
3. Move feature branch to "develop"
3.1 Perform Review
Once work on the feature branch has been concluded, the results are checked by colleagues/reviewers before being returned to "develop".
1. Perform the review via LemonTree. To compare 2 revisions,
- select them in the "Show Log" menu of TortoiseGIT.
- Click "Compare revisions"
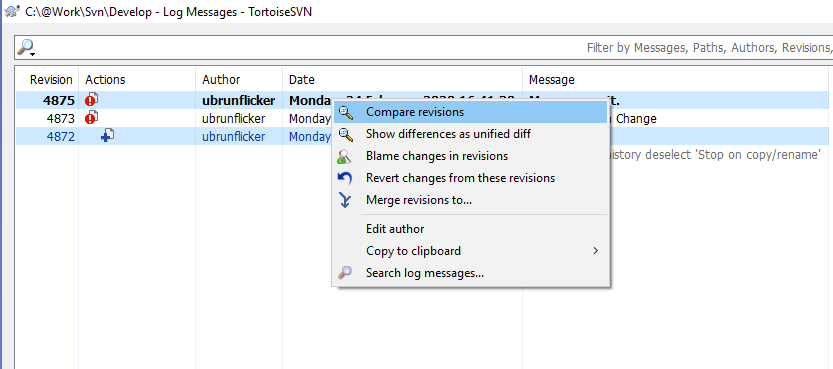
- Double-Click on the .eap file you want to review.
Since LemonTree is integrated in TortoiseSVN it will be automatically started when a workflow is used for performing a diff on eap(x) files. For example comparing branches via Revision Graph.
=> LemonTree provides the possibility to flag elements as "Reviewed" and filter for "Reviewed" elements. Details: Impacted Elements / Impacted Diagrams List
=> LemonTree provides the possibility to save sessions. This enables the user to save the current state of review and transfer sessions. Details: LemonTree Session Handling
2. If Review OK --> Continue with step 3.2 --> Merge back feature branch.
3. If Review Remarks --> Back to the modeler and after incorporating the changes start again with step 3.
3.2 Merge back feature branch
Before we can bring the feature branch back to develop, run through Step 2 one last time to make sure the feature branch we're about to bring back is based on the current version of develop.
Afterwards - to actually bring the changes back from the feature branch to develop, we will perform another merge. This one is similar, but not identical to when we're updating the feature branch with the latest changes from develop.
Switch to Develop
Before we can actually perform the merge, we need to switch back to the develop branch.
To do so, select the option in the TortoiseSvn context menu:
and select the name of your develop branch in the dropdown list.
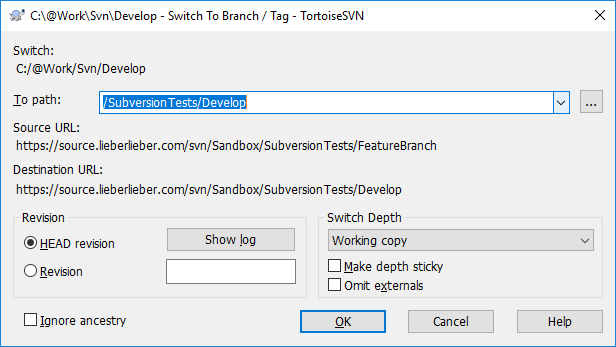
Confirm by clicking "OK".
Merge Changes
To do so, start the "Merge" option:
Select "Merge a range of revisions" in the first dialog.
Select the feature branch and "All revisions" in the second dialog:
Leave the third dialog as it is.
Start the merge via the "Merge" button.
There should not be any conflicts during this step. If there are, your feature branch was not up-to-date with the latest changes from develop (usually).
If you encounter a conflict here, revert your changes:

and then start over with Step 2.
Commit Changes
If the changes could be brought back to develop without any conflicts, commit them now.
4. Delete Feature branch
The only thing left to do at this point is to delete the feature branch.
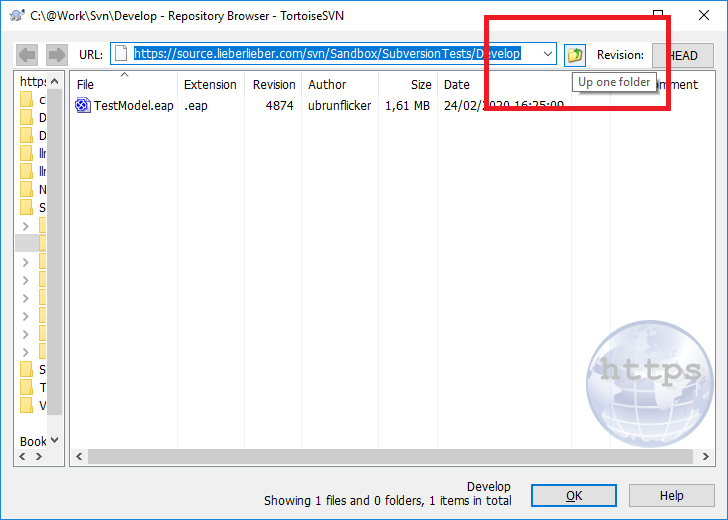
To do so, start the Repo Browser:
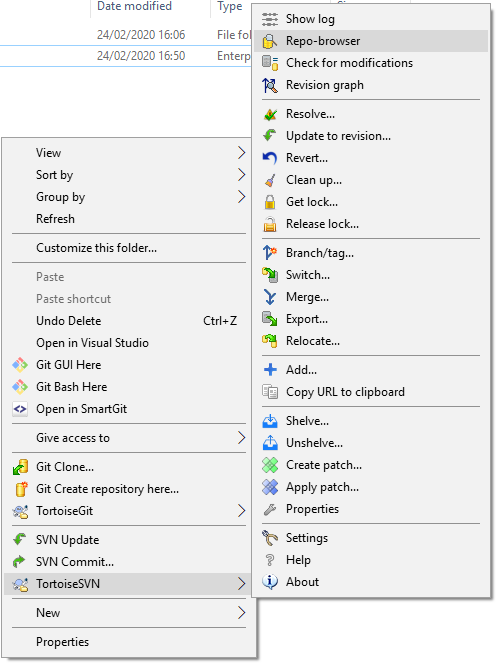
Navigate up one folder:
delete the folder with the name of your feature-branch and commit your changes.
And we're done!